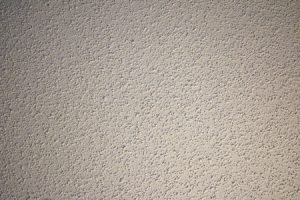
 Popcorn ceilings, once ubiquitous, have been out of style for quite some time now. If your older home has one and you’d like to get rid of it, here are some tips for removing your popcorn ceiling.
Get ready to get messy
Removing a popcorn ceiling makes for lots of dust and debris. Prep your home and keep it clean by removing ceiling fixtures, fans and all unnecessary furniture and covering floors, walls and remaining furniture with a plastic drop cloth. Avoid using canvas drop cloth because moisture can soak through.
Test for asbestos
If your home was built prior to 1980, chances are your popcorn ceiling contains harmful asbestos or lead. Get it tested before undertaking any DIY removal project.
Choose a removal method:
Scraping
Use a four-inch utility knife or paint knife to chip away at the popcorn and create a smooth surface. While some people recommend wetting the ceiling first, this could actually cause the ceiling to expand and crack. It’s more time-consuming to scrape the popcorn off dry, but it may be better for your ceiling in the long run.
Covering with drywall
This is the best option if your ceiling has lead or asbestos. Call a pro for a more precise job.
While you may be able to remove popcorn ceiling on your own, it’s a good idea to hire a professional painter to finish the room and make it look fresh and updated. If you need painting services for your Sunland, California-area home, contact Richard Stewart Painting. We’re paint pros who will make your home look amazing at a price you can afford!


Recent Comments